
PyClarify quickstart
>>> import pyclarify
Prerequisites
You’ll need to know a bit of Python. For a refresher, see the Python tutorial.
You’ll need your Clarify credentials. Click here for how to find them.
Interact with Clarify
PyClarify provides a fast and easy way to interact with Clarify using the APIClient() and Client() class .
This class takes as an argument the path of your credentials in string format, which should always be the first step when starting to interact with PyClarify.
For information about the Clarify Developer documentation click here.
Using the APIClient class
Add Signal metadata
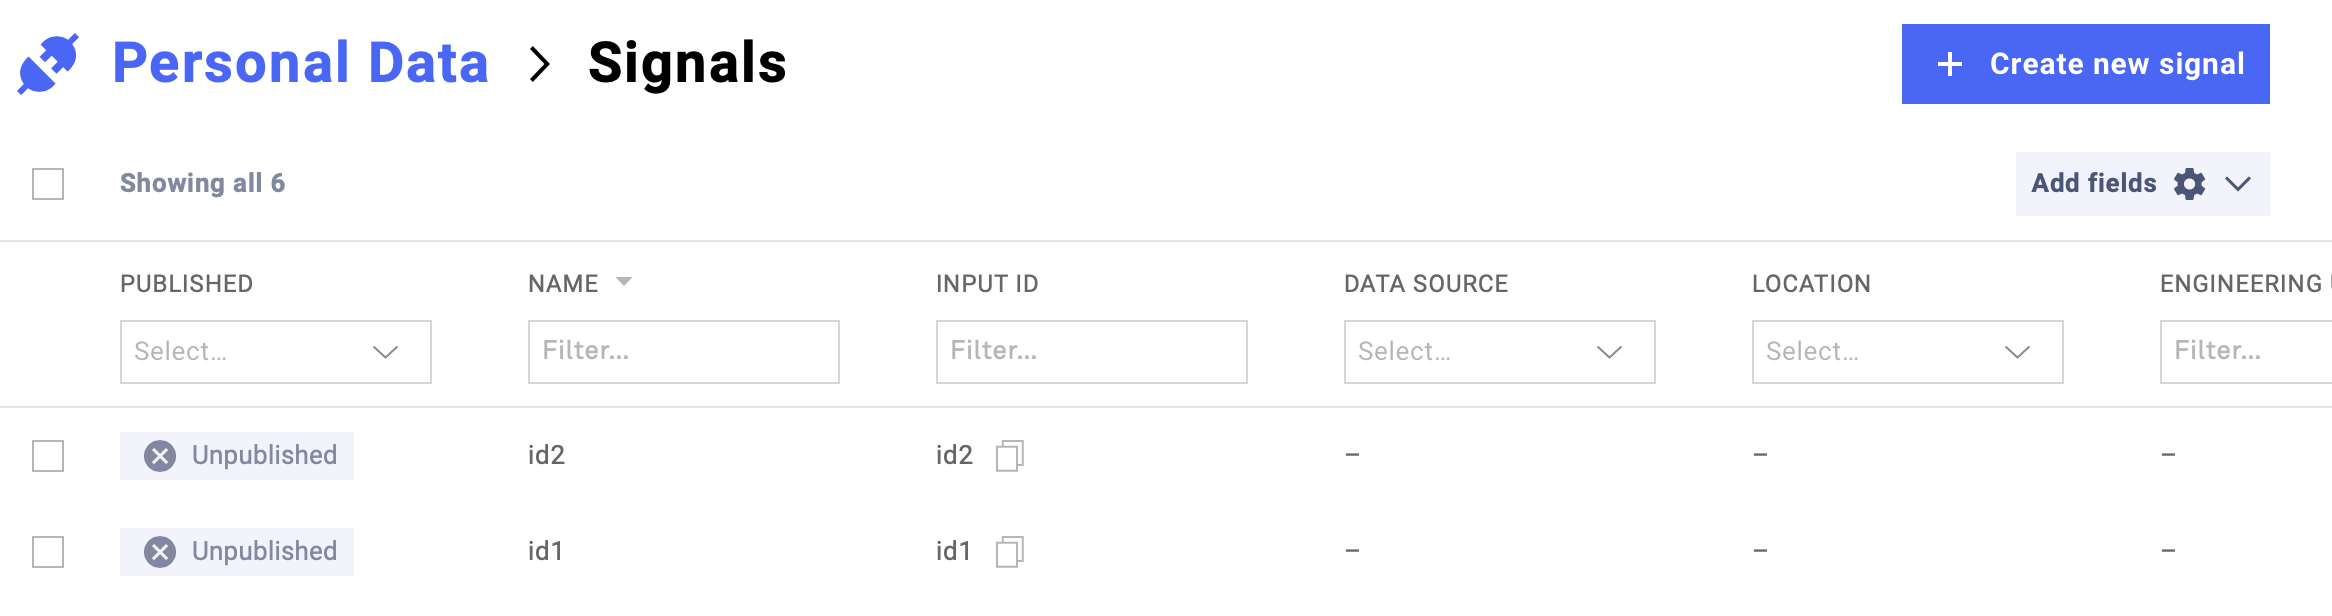
Inserts metadata for one or multiple signals. The signals are uniquely identified by its INPUT_ID.
>>> from pyclarify import APIClient, SignalInfo
>>>
>>> client = APIClient("./clarify-credentials.json")
>>>
>>> signal_1 = SignalInfo(
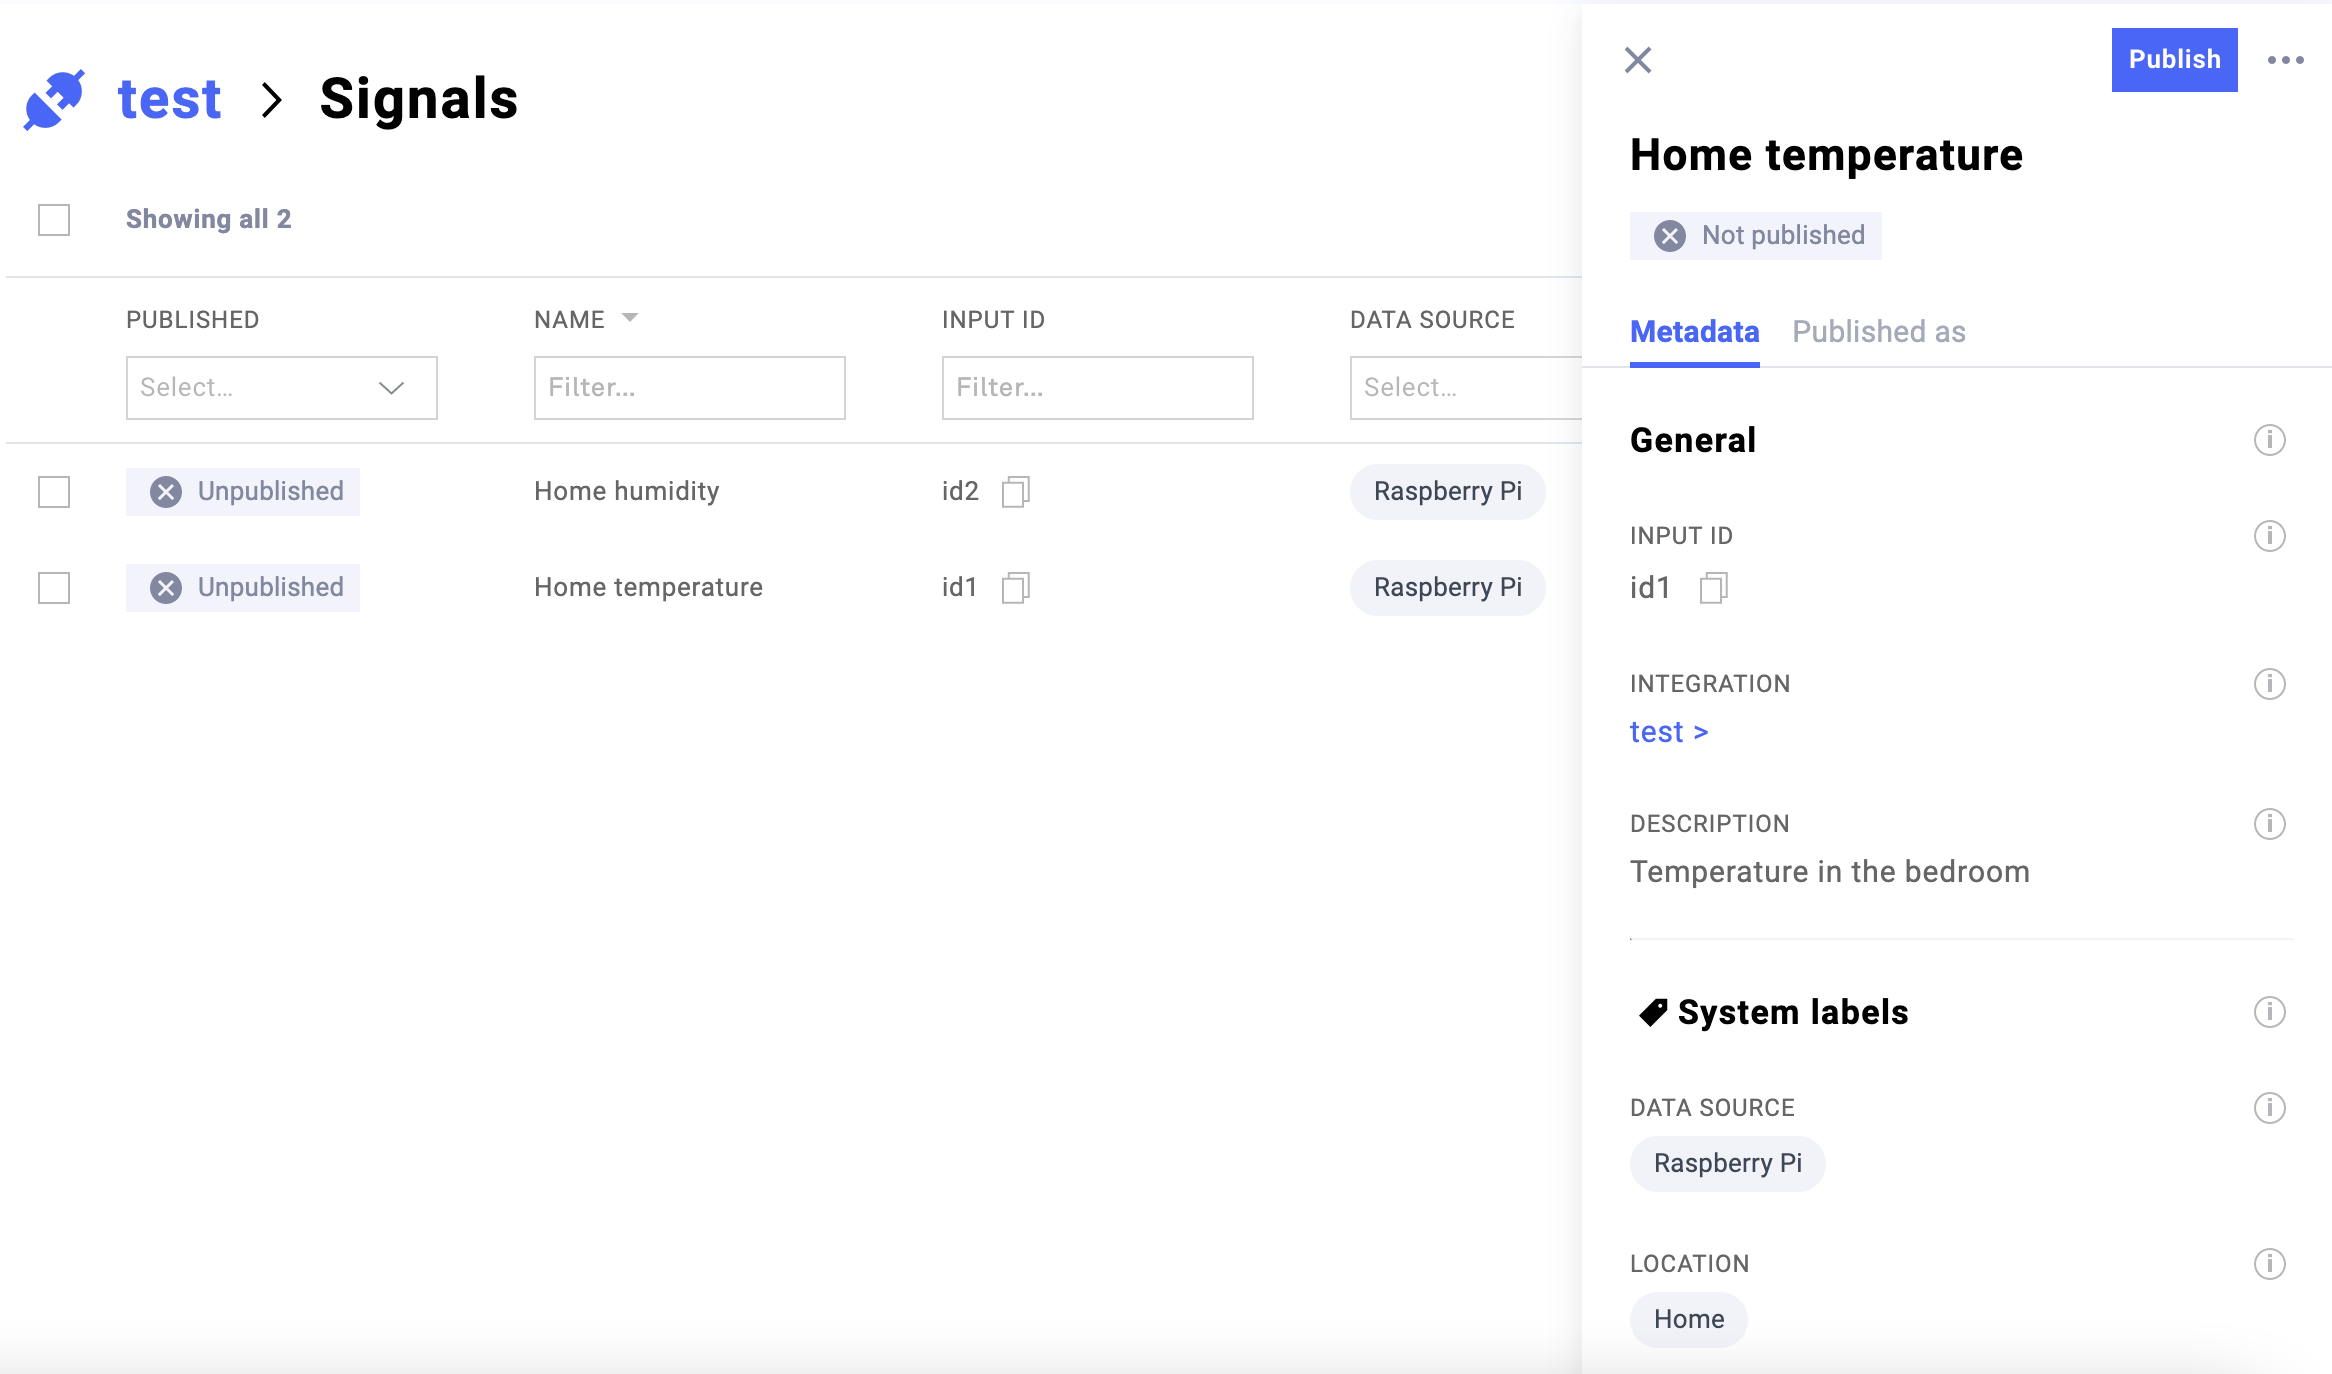
>>> name="Home temperature",
>>> description="Temperature in the bedroom",
>>> labels={"data-source": ["Raspberry Pi"], "location": ["Home"]},
>>> )
>>>
>>> signal_2 = SignalInfo(
>>> name="Home humidity",
>>> description="Humidity in the living room",
>>> labels={"data-source": ["Raspberry Pi"], "location": ["Home"]},
>>> )
>>>
>>> params = {"inputs": {"<INPUT_ID_1>": signal_1, "<INPUT_ID_2>": signal_2}, "createOnly": False}
>>>
>>> response = client.save_signals(params= params)
>>> print(response.json())
Now, you should be able to see the newly created signal in Clarify.
Insert data into a signal
Inserts data to one or multiple signals.
>>> from pyclarify import DataFrame, APIClient
>>>
>>> client = APIClient("./clarify-credentials.json")
>>>
>>> date = ["2021-11-01T21:50:06Z",  "2021-11-02T21:50:06Z"]
>>>
>>> data = DataFrame(
>>>     series={"<INPUT_ID_1>": [1, None], "<INPUT_ID_2>": [None, 5]},
>>>     times = date,
>>> )
>>>
>>> response = client.insert(data)
>>> print(response.json())
Now, you should be able to see the newly created signal in Clarify.
Get Signal metadata
This call retrieves signal metadata and/or exposed items. This call is a recommend step before doing a publishSignals call. For more information click here .
>>> from pyclarify import APIClient
>>>
>>> client = APIClient("./clarify-credentials.json")
>>>
>>> signals = {
>>>             "include": True,
>>>             "filter": {"id":{"$in": ["<SIGNAL_ID>"]}},
>>>             "limit": 10,
>>>             "skip": 0
>>>            }
>>> items = {"include": True}
>>>
>>> params = {"signals": signals, "items": items}
>>>
>>> response = client.select_signals(params = params)
>>> print(response.json())
Publish signals
Publishes one or multiple signals to create one or multiple items, and creates or updates a set of signals with the provided metadata. Each signal is uniquely identified by its input ID in combination with the integration ID.
>>> from pyclarify import APIClient, SignalInfo

>>> client = APIClient("./clarify-credentials.json")
>>>
>>> itemsBySignal = {'<SIGNAL_ID>': SignalInfo(name="<item_name>")}
>>> createOnly = False
>>>
>>> params = {"itemsBySignal": itemsBySignal, "createOnly": createOnly}
>>>
>>> response = client.publish_signals(params=params)
>>> print(response.json())
Get Item data and metadata
Get data and metadata for one or multiple items. To get the data from an item, you must first have an integration with reading access.
To enable it, go to Clarify -> Intergrations, select the Intergration you want to use, and enable Access to item data
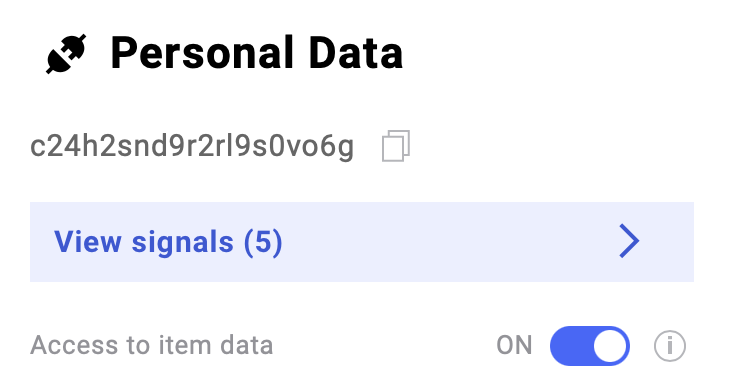
Once reading access is enabled, use the select_items() method.
>>> from pyclarify import APIClient
>>>
>>> client = APIClient("./clarify-credentials.json")
>>>
>>> items = {"include": True, "filter": {"id": {"$in": ["<ITEM_ID>"]}},  "limit": 10, "skip": 0}
>>> data = {
>>>         "include": True,
>>>          "notBefore":"2021-11-09T21:50:06Z",
>>>          "before": "2021-11-10T21:50:06Z",
>>>          "rollup": "PT1H"
>>>         }
>>> params = {"items": items, "data": data}
>>>
>>> response = client.select_items(params = params)
>>> print(response.json())
Using the Client class
Save signals
Inserts metadata to one or multiple signals. The signals are uniquely identified by its <INPUT_ID>.
>>> from pyclarify import Client, SignalInfo
>>>
>>> client = Client("./clarify-credentials.json")
>>>
>>> signal = SignalInfo(
>>>    name = "Home temperature",
>>>    description = "Temperature in the bedroom",
>>>    labels = {"data-source": ["Raspberry Pi"], "location": ["Home"]}
>>> )
>>> response = client.save_signals(input_ids=['<INPUT_ID>'], signals=[signal], create_only=False)
>>> print(response.json())
Insert data into a signal
Inserts data to one or multiple signals.
>>> from pyclarify import DataFrame, Client
>>>
>>> client = APIClient("./clarify-credentials.json")
>>>
>>> date = ["2021-11-01T21:50:06Z",  "2021-11-02T21:50:06Z"]
>>>
>>> data = DataFrame(
>>>     series={"<INPUT_ID_1>": [1, None], "<INPUT_ID_2>": [None, 5]},
>>>     times = date,
>>> )
>>>
>>> response = client.insert(data)
>>> print(response.json())
Get metadata from signals and/or items
Get metadata from selected signals and/or items. This call is a recommend step before doing a publish_signals call.
>>> from pyclarify import Client
>>> client = Client("./clarify-credentials.json")
>>> response = client.select_signals(
>>>                 ids = ['<SIGNAL_ID>'],
>>>                 name = "Electricity",
>>>                 labels = {"city": "Trondheim"},
>>>                 limit = 10,
>>>                 skip = 0,
>>>                 include_items = True
>>> )
>>> print(response.json())
Publish signals
Publishes one or multiple signals to create one or multiple items, and creates or updates a set of signals with the provided metadata. Each signal is uniquely identified by its input ID in combination with the integration ID.
>>> from pyclarify import Client, Item
>>>
>>> client = Client("./clarify-credentials.json")
>>>
>>> item = Item(
>>>    name = "Home temperature",
>>>    description = "Temperature in the bedroom",
>>>    labels = {"data-source": ["Raspberry Pi"], "location": ["Home"]},
>>>    visible=True
>>> )
>>> response = client.publish_signals(signal_ids=['<SIGNAL_ID>'], items=[item], create_only=False)
>>> print(response.json())
Get Item data
Get data for one or multiple items. To get the data from an item, you must first have an integration with reading access.
To enable it, go to Clarify -> Intergrations, select the Intergration you want to use, and enable Access to item data
Once reading access is enabled, use the select_items() method.
>>> from pyclarify import Client
>>>
>>> client = Client("./clarify-credentials.json")
>>>
>>> response = client.select_items_data(
>>>     ids = ['<ITEM_ID>'],
>>>     limit = 10,
>>>     skip = 0,
>>>     not_before = "2021-10-01T12:00:00Z",
>>>     before = "2021-11-10T12:00:00Z",
>>>     rollup = "P1DT"
>>> )
>>> print(response.json())
Get Item metadata
Get metadata for one or multiple items.
>>> from pyclarify import Client
>>>
>>> client = Client("./clarify-credentials.json")
>>>
>>> response = client.select_items_metadata(
>>>     ids = ['<ITEM_ID>'],
>>>     name = "Electricity",
>>>     labels = {"city": "Trondheim"},
>>>     limit = 10,
>>>     skip = 0
>>> )
>>> print(response.json())